TBD on Ning
Creating a Website 07: Background Code
If you've made "skins" for your profile page, you've worked with css codes like the ones in the "default.css". Generally, the background color is similar to the main color of the background image you are going to use. That way, if something happens to cause the image note to load, the rest of the styling will not clash with the background color. Also, if you are using a background image that covers only part of the page, the background color should blend in.
For this exercise, open the "default.css" file that is in the "Flourish" folder with a plain text editor. Under the 2nd entry (body), you will find this code:
background: #FFB42F url(images/img02.png) repeat-x left top;
There are different ways we could change the code to style the background, but we'll begin with the gradient image the "Flourish" template uses.
I. Non-tiling image and color background
In the last lesson, "Creating a Website 06: Gradient Image" we learned one way to change the color used in the gradient. Now we need to change the code so that the background color is the same color as the bottom of the gradient. In the "Examples" image below, "A" shows the image changed, but the background color was not changed.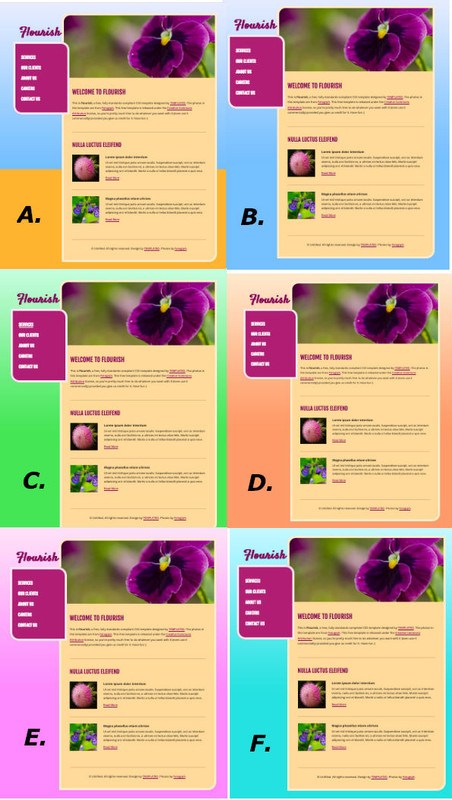
If you want to download and use the images shown in the post about gradient images, here are the colors that will go with them. Remember, you should give the gradient you want to use the name, "img02" and replace the original img02 in the images folder.
B. blue #74c0ff
C. green #44e654
D. orange #ff9a69
E. pink #ff89ff
F. turquoise #23e2e0
Now all you need to change in the body background code is the color. Be sure to keep the pound key in the color code.
background: #COLOR_CODE url(images/img02.png) repeat-x left top;
Save the changes you made in the "default.css" file and then open the template with your browser. You should see the template with the new background. Each time you make a change to the css file, save it and then refresh your browser to see the changes.
You can create a completely new gradient image and use a different name and format (jpg, png) but you'll need put the image in the images folder of the template. You will also need to know the color code for the bottom of the image. There are two places the code will need to be changed:
background: #COLOR_CODE url(images/IMAGE_NAME_AND_SUFFIX) repeat-x left top;
II. Simple tiling image
What if you wanted to use a simple tiling background on your website?
In that case, your image would need to be in the images folder of the "Flourish" template. If it is a png image, you could name it "img02.png" or you could use a jpg and give it another name. Just be sure that your code has the correct name. You will also want the color to match the main color of the image. You will also need to change
repeat-x
to
repeat
in the code.
background: #COLOR_CODE url(images/img02.png) repeat left top;
OR
background: #COLOR_CODE url(images/IMAGE_NAME_AND_SUFFIX) repeatleft top;
III repeat-x and repeat-y
repeat-x will have an image tile across the top. repeat-y will have an image tile down one side. The position following "repeat" will determine whether it tiles )or starts tiling) on the left, the center or the right.
Here is an example of tiling an image on the left.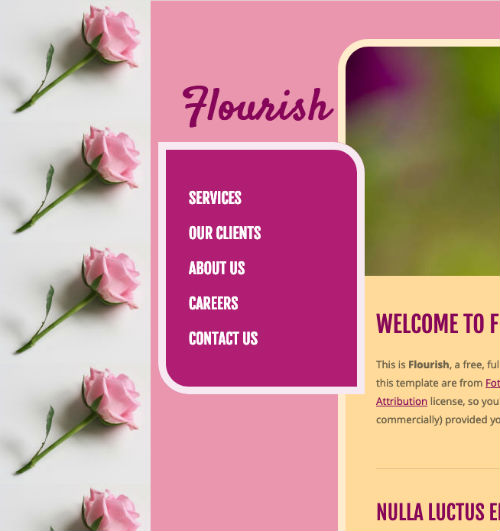
And here is the code:
background: #ea96ae url(images/pinkrose200x158.jpg) repeat-y left top;
Just replace "pinkrose200x158.jpg" with the name of the image you plan to use.
However, you also need to make adjustments so that the content doesn't cover up the roses when you make the window smaller. In this template, we can add a line to the code - padding-left: 200px; - under #wrapper:
/** WRAPPER */
#wrapper
{ position: relative;
margin-bottom: 50px;
padding-left: 200px;}
Have a little fun and play around to see what you can do. Post questions or share what you've done if you want.
Tags: background, code, color, design, gradient, image, web
Views: 11
Replies to This Discussion
-
Permalink Reply by Mimi58 on
-
I posted about one way to find the color code you need to use with the gradient image - Extracting Color Code - http://teebeedee.ning.com/group/studio/forum/topics/extracting-colo... If you have a favorite method, please share.
-
-
-
You can use other small images and have them blend into the background color. Here are two I created at pixlr. I used the "vignette" filter and did some maniplating with the erase tool.
Butterfly and flower
Cat and Rose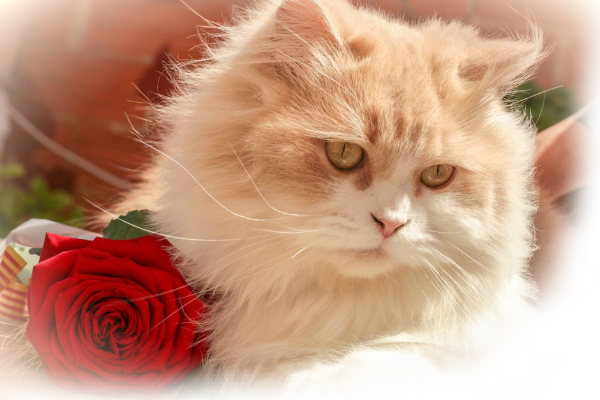
To use them with the "Flourish" template, a line of code needs to be added to the "default.css" file to move the wrapper down just a bit. Here's the wrapper code with the added line:
#wrapper
{
position: relative;
margin-bottom: 50px;
padding-top: 200px;
}
To use an image such as the two above, you need to put the image in the "images" folder of the "Flourish" template. Then replace "IMAGE_NAME" in the code with the name of your image. Be sure that the suffix (jpg or png) matches your image.
background: #faf8a5 url(images/IMAGE_NAME.jpg) no-repeat left top;
Also, be sure the information at the end of the line matches what you want to do:
no-repeat - you don't want the image repeating
left - or you could have it show on the right
top - you will proably want it to appear or start at the top.
background: #faf8a5 url(images/IMAGE_NAME.jpg) no-repeat left top;Also, change the color code to blend with your image:
background: #COLOR url(images/IMAGE_NAME.jpg) no-repeat left top;
I made an extra adjustment with the cat and rose image. I added a left margin to the wrapper:
#wrapper
{
position: relative;
margin-bottom: 50px;
padding-top: 200px;
margin-left: 200px;
}
And here is how it looked: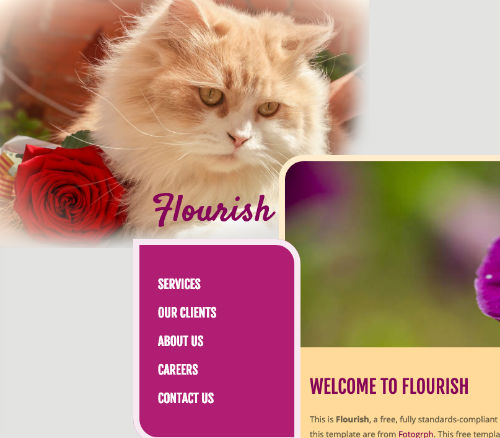
Download the butterfly-flowers and/or cat-rose image(s) if you want or use some small images you have and play around to see what you can do. -
© 2025 Created by Aggie.
Powered by
![]()